Walkthrough 6-4: Set request and response data
In this walkthrough, you set response and request data for HTTP Listener and HTTP Request operations. You will:
· View the default setting for a response body.
· Set a response header.
· View the default setting for a request body.
· Set a request query parameter.
Starting file
If you did not complete the previous walkthrough, you can get a starting file here. This file is also located in the solutions folder of the student files ZIP located in the Course Resources.
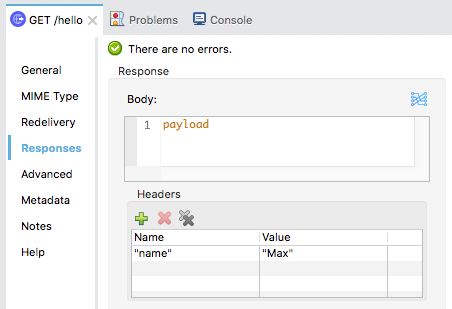
View default response body
1. Return to apdev-examples.xml.
2. Double-click the GET /hello HTTP Listener in helloFlow.
3. In the GET /hello properties view, click the Responses tab.
4. In the Response section, locate the expression that sets the response body by default to the value of the payload.
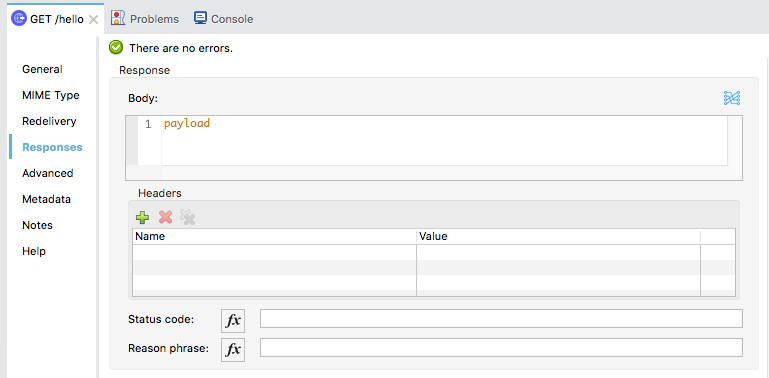
Set a response header
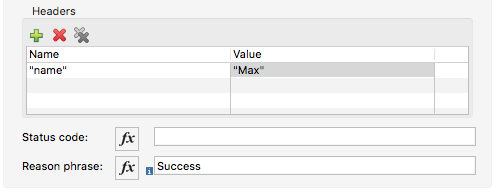
5. In the Headers section for the response, click the Add button.
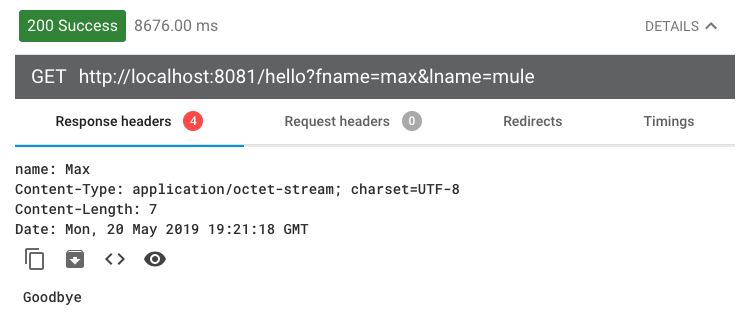
6. Set the name to "name" and the value to "Max".
7. Locate the status code field and leave it blank so the default value 200 is returned.
8. Set the reason phrase to Success.
Run the application and review response data
9. Save the file to deploy the project.
10. Return to Advanced REST Client and send the same request.
11. In the Mule Debugger, click Resume until you step through the application.
12. In Advanced REST Client, locate your new status code reason phrase.
13. Review the response headers; you should now see the new name header.
View default request body
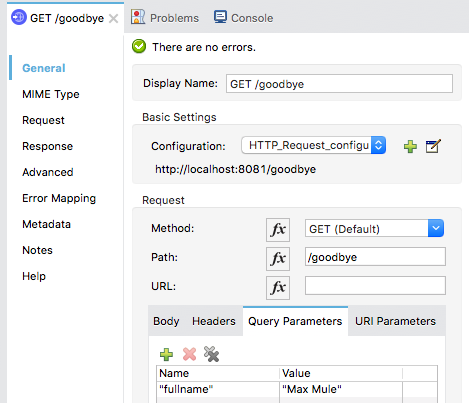
14. Return to Anypoint Studio and switch perspectives.
15. Double-click the GET /goodbye HTTP Request in helloFlow.
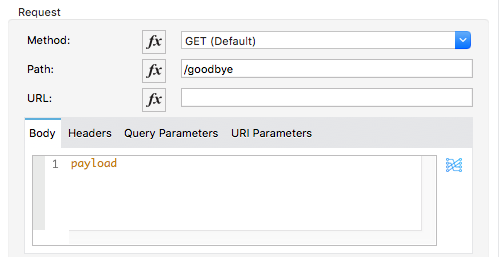
16. In the GET /goodbye properties view, locate the Request section on the General tab.
17. On the Body tab, locate the expression that sets the request body by default to the value of the payload.
Set a request query parameter
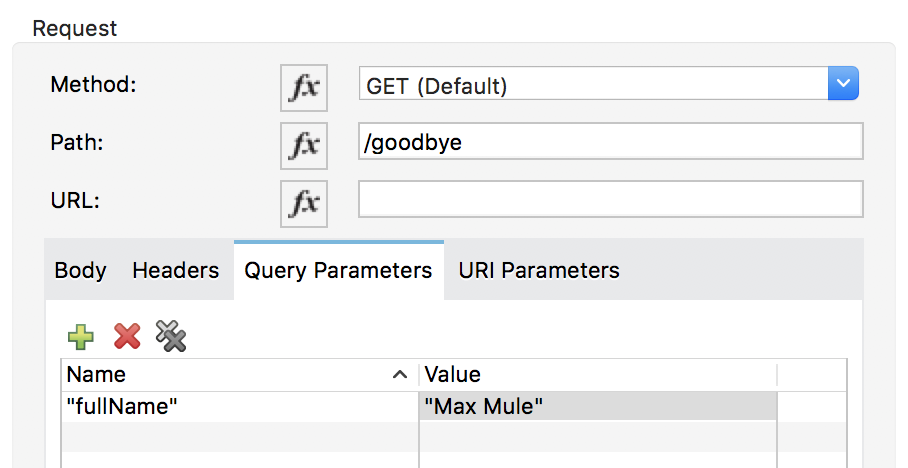
18. Select the Query Parameters tab and click the Add button.
19. Set the name to "fullName" and the value to "Max Mule".
Debug and verify the query parameter is sent with the request
20. Save the file to redeploy the project.
21. Return to Advanced REST Client and send the same request.
22. Return to the Mule Debugger and step into goodbyeFlow.
23. Expand Attributes and locate the fullName query parameter.

24. Step through the rest of the application.
25. Switch to the Mule Design perspective.
26. Stop the project.